It's been pretty cloudy for the past few weeks, and getting decent Moon photos has been difficult at best. I had a productive night on Sunday, November 2, and these photos are from that session. They're variations on one image taken at 10:48 PM and another taken at 10:50 PM.
I wanted to explore the ways of sharpening images of the Moon. I've noticed some photographers at the Facebook group SHOOT THE MOON routinely get sharp, crisp images with stunning detail. How do they do that.? I pondered this for a while and then a term came back to to me from many years ago: unsharp masking.
Unsharp masking is a technique which...well, as best I understand it, it brings out details in your images by sharpening edge contrasts or something. I read about it in an astronomy magazine fifteen years or so ago. The article covered some ways to do it manually, involving stacked images with some slightly out-of-focus or overexposed or something. It also talked about techniques for manually developing photos using an unsharp mask - this was back when astrophotography often meant you were developing your own photos in your own darkroom. Now, it means you found the "Unsharp Mask" button on your free photo development software.
One of the problems with photographing the Moon is that it is so bright. This tends to overwhelm the imager, especially when the Moon is between one and three weeks old, and can create soft images that almost seem washed-out.
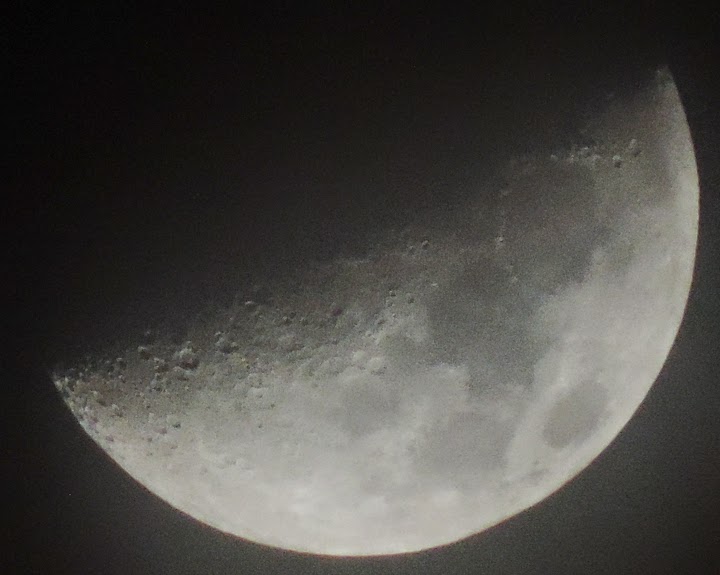
 |
| Waxing gibbous Moon, November 2, 2014, 10:48 PM |
The Unsharp Mask feature on the GIMP software I use recommends decomposing the image into HSV format, applying the unsharp mask, and then recomposing the image. I have no idea what those words mean, but I followed the onscreen instructions (available by hitting the F1 key while hovering over the Unsharp Mask button) and the result was a subtle but detectable improvement in the image.
 |
| Unsharp mask applied per instructions |
But I had had more dramatic results last night when I was playing with this. At that time I wasn't following the directions, just winging it. I decided to try winging it again, and got a more dramatic but very artificial-looking result.
 |
| Unsharp mask: winging it |
Some time ago I developed my own technique for getting sharper images of the Moon when it's close to Full. I discovered the Manual setting on my camera, and through monkeying with the settings I discovered one that takes 60 images per second at a lower resolution. These images are dimmer but much less washed-out, so I can process them to bring out detail that would otherwise be lost.
 |
| High shutter speed image, November 2, 2014, 10:50 PM. |
The first step in improving this image is to brighten in. How much brightening is needed depends on how bright the original image was. In this case, I brightened it by 95 somethings. (I have no idea what.)
 |
| Brightness increased by 95. |
I followed this by cranking up the contrast. Through trial and error, I decided that the appropriate contrast increase would be 85 somethings. So that's where it is.
 |
| Brightness increased by 95, contrast enhanced by 85. Looks pretty good. |
So there you have it: two ways of improving the appearance of the Moon. I will continue to learn the unsharp mask method, but I'm happy with my brightness and contrast enhancement technique.